Feed on
Posts
Comments

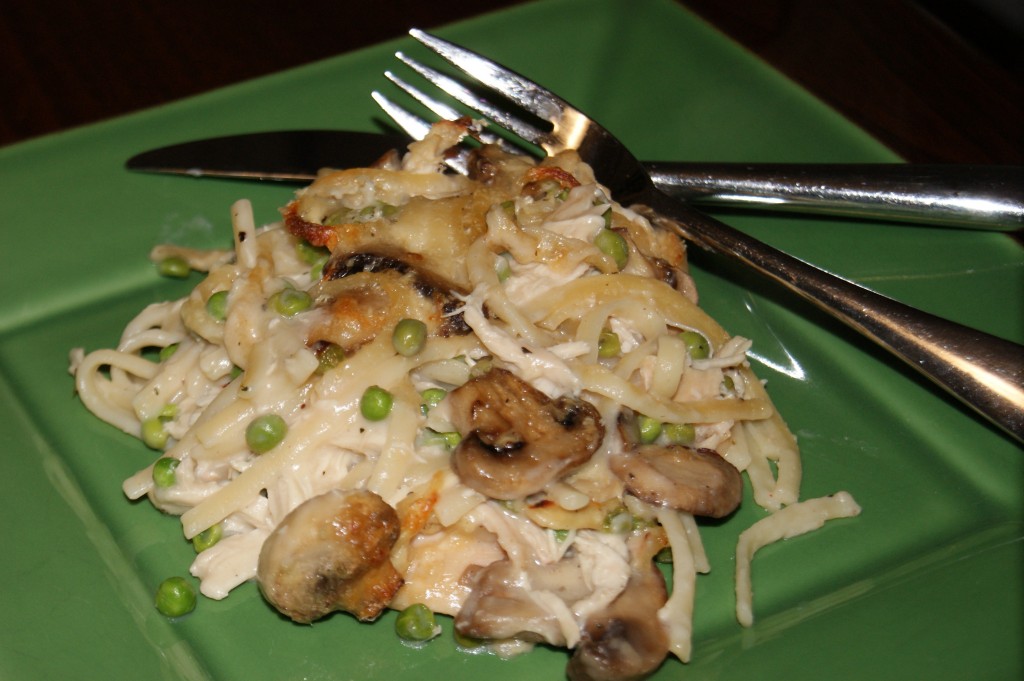
Chicken Tetrazzini Recipe

Blasted tech support.  I spent the whole day yesterday trying to get this post onto my site.  Someone asked me for a chicken tetrazzini recipe.  I can’t remember who it was, SMIL perhaps?  Someone else?  I haven’t made this in ages, so it took me awhile to track it down.  I don’t think I’ve attempted much in the way of casseroles since I was working in an office job six and a half years ago.

Yesterday I was migrating my website to a different server to correct the interminable slowness my site has been experiencing.  The first tech support call was great.  The second guy is responsible for the rampant hostility toward computer guys everywhere.  You know like the Nick Burns computer guy skit from Saturday Night Live.  I used to be Nick Burns – well hopefully I was less of a jerkhole, but that was my job.  At the end of the day, the site has been migrated and from my end all the issues seem resolved.  Please let me know if you continue to experience any time outs or slowness, and I’ll try to keep traceroutes, ping tests, and packet loss out of casual conversation.

I really was trying to be reasonable with the chicken tetrazzini.  I planned to make one for dinner and one for the freezer.  Found the recipe, then completely abandoned any potential for taking the easy road.  Cause I’m all from scratch, y’all.  Don’t feel compelled to fall victim to my insanity.  If you do, I recommend this as a Sunday project if you’re a working person or at least as a part of a larger meal plan.

My dear friend, Elizabeth, tried some Oprah meal planning awhile back.  In my memory it involved something like buying two rotisserie chickens, shredding them, then making four meals from the bounty.  I can’t remember much other than I don’t think she was wowed by the results.  My problem is we don’t really eat dark meat, so rotisseries don’t really provide a lot of shredded chicken.  Many things in cooking don’t translate into economies of scale but shredding chicken does.  No need to go all crazy and roast first, then boil the chicken like I did.  I was suffering from existential angst on Monday, forgive me.  I’ve been boiling split breasts for chicken soup for years with wonderful results, the extra roasting is so *not* necessary.  In any case, if you want to shred your own chicken, just get a large pot and do a bunch – like 8 or 10 large split breasts.  Then you can have shredded chicken and broth for Chicken and Goat Cheese Enchiladas or Chicken Stuffed Fried Avocados or Mediterranean Penne  or Chicken Salad or something of your very own creation.

Chicken Tetrazzini Recipe

adapted from Martha Stewart Everday Food April 2007

makes 2 casseroles, each having about 5-6 servings

5 split chicken breasts

kosher salt

fresh ground pepper

1 lb sliced white mushrooms

1/2 c. flour

3 c. 1% milk

3/4 c. dry white wine

3 c. grated Parmesan cheese

1/2 tsp dried thyme leaves

1 lb. linguine

10 oz. frozen petite peas

(Martha uses the shredded meat from a rotisserie chicken, if you go that route you’ll also need 2 c. of chicken broth)

In a large pot, cover split breasts with water, then add 2 teaspoons of salt and 16 turns fresh ground pepper.  Bring to a boil, then reduce heat to a simmer.  Simmer for about an hour, then remove chicken to a bowl.  Using a two bowl system, remove the skin and bones from the split breasts with two forks, then move your chicken to clean bowl and shred.  Repeat until you’ve shredded all your chicken.  Reserve 2 cups of chicken broth.

In a heavy bottomed skillet over medium-high heat, melt 2 tablespoons of butter, then add sliced mushrooms.  Season mushrooms generously with kosher salt and fresh ground pepper.  I sprinkle the whole surface, but you can use approx 1/2 teaspoons of salt as a guide.  Increase heat to high to brown mushrooms, stirring occasionally.  Wait for mushrooms to release all their water, then continue over high heat until nicely browned.  Remove mushrooms to a bowl.

Meanwhile bring a large pot of salted water to a bowl.  Break linguine in half, then cook approx nine minutes until just slightly less than al dente.  Drain.

In the same skillet used to brown the mushrooms, melt remaining 4 tablespoons of butter, then add flour, stir, and brown for 2 minutes.  Add milk while whisking furiously, then add wine and chicken broth.  Bring to a boil, then continue to cook over medium heat for 3 more minutes.  Whisk every 30 seconds or so.  Add a teaspoon of salt and 20 turns of fresh ground pepper, then 2 cups of the grated parmesan and the thyme.  Stir to combine, then adjust seasonings to taste.  This is the easiest place to mess up the recipe!  Be sure to season your sauce to taste.  The pasta, the chicken, and the peas are all pretty bland – all the flavor comes from the sauce!

In the now empty pasta pan, combine pasta, shredded chicken, browned mushrooms, peas, and sauce.  Stir until thoroughly coated.  Pour into two 8×8 glass pans.  Top with remaining cup of Parmesan.  Cover one pan with Saran wrap, then press down on casserole to create an airtight seal.  Freeze for up to two months.  Bake other casserole for 30 minutes at 400, until bubbly.  In full disclosure, I don’t use my freezer very often.  I’m not entirely sure what will happen when I cook the frozen one, but Martha says it’s freezer friendly so I believe her.  I’m guessing to thaw it in the fridge the day before, then cook it covered at 400 (30 min?), then uncovered  another 15-20 for browning.  I’ll let you know when I cook mine!
 

Print This Post

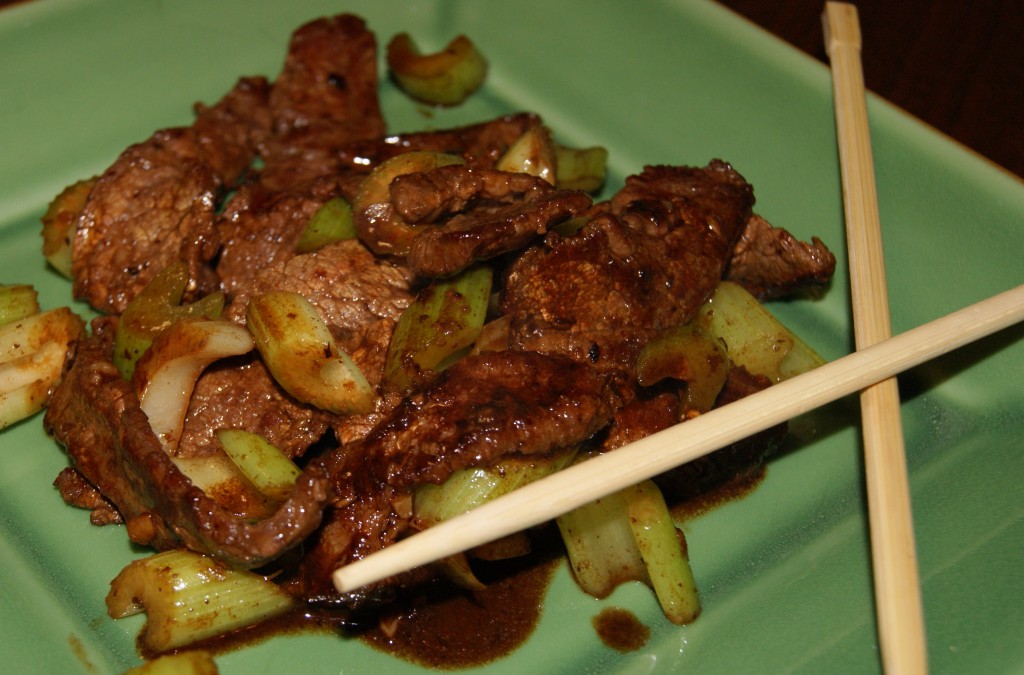
To combat the inertia threatening to lock me in a culinary bell jar, I’ve been rereading an old stack of the now-defunct Gourmet Magazine.  Looking for a flavor, an ingredient, a style I’d forgotten about, anything really.  I stumbled across a 2008 recipe for cumin-scented stir-fried beef with celery.  The recipe looked intriguing and surprisingly quick to prepare.  I’ve never stir-fried flank steak before, but I loved the way this turned out and will never again purchase the mystery grocery stir-fry cut.
I made only minor changes to the original recipe based on what ingredients I had on hand.  Never be afraid to make little changes!  If you wait to have everything on hand, you can never be spontaneous.  Though, I just realized my math was off when I was adjusting quantities so I halved all the seasonings.  Anyhow, this is how I prepared it, and we thought it was great.  If you’re cooking for children or my mother, you should probably half the amount of crushed red pepper shown below.  Otherwise, when eaten with rice, I would call it only mildly spicy.  L.E. loved it, but Q was wary (spicy), so use your best judgment.

Spiced Flank Steak and Stir Fry with Celery Recipe

serves 2

2/3 lb flank steak

2 and 1/2 tsp soy sauce

1/2 tsp cornstarch

kosher salt

2 tbsp sake (extra dry Ginjo Hananomai – you could also use dry sherry, dry vermouth, or Chinese rice wine)

2 tbsp grapeseed oil

ground ginger

3 medium-sized garlic cloves, minced

1/8 tsp cumin seeds

1/8 tsp crushed red pepper flakes

3 stalks celery, sliced diagonally 1/2 inch thick

Slice the flank steak in half following the grain.  Slice flank steak against the grain into slices about 1/8th of an inch thick.  Place beef slices in a bowl and stir with 1/2 teaspoon soy sauce, 1/4 tsp cornstarch, and a pinch (really just a pinch – this will be plenty salty!) of kosher salt.  In a separate bowl combine the remaining 2 teaspoons of soy sauce, 1/4 teaspoon cornstarch, and sake.

Heat a heavy-bottomed skillet over high heat until it is very hot.  Add 1 tbsp of grapeseed oil, then swirl to coat skillet evenly.  Cook half of the beef slices – making sure to lay slices flat in only one layer.  Test one slice after about 30 seconds and flip if browned.  Transfer to a plate when browned – flank steak slices will cook for a total of just about 1 minute.  Add the remaining teaspoon of grapeseed oil and repeat with the second batch. Set cooked flank steak aside.

Turn off the heat on the skillet.  Add 3-4 heavy shakes of the ground ginger.  This will smell very pungent – to the point where you’ll wonder if you’ve overdone it, but fear not.  Add garlic, cumin, and red pepper flakes, then return heat to almost high and stir fry for about 15 seconds.  Add the celery and stir fry for 1 minute.  Add back reserved beef and accumulated juices; stir.  Stir reserved soy/sake mixture, then add to skillet and stir.  Stir-fry all together about a minute longer, then serve.

Print This Post

It’s been an absurdly long time since I posted a new recipe.  It really wasn’t intentional; I’ve just been doing other things.  Many people asked if I stopped cooking or was quitting the blog.  As for cooking, no I haven’t stopped, just suffered from a lull in creativity and perhaps from over committing.  As for the blog, I never intended to stop writing.  I got a new computer, was slow to transfer things over, then looked up and half of summer had passed.
What have I been up to the last six months?  Inertia.  Does that ever happen to anyone else?  I wish I had more to report, just enjoying life mainly.  As for culinary endeavors, here are a few of the best meals we had this summer.  Martha Stewart’s Thai Chicken and Noodle Salad – Click where it says Spicy Asian Dressing for the recipe, do *not* leave out the mint, and if you’re feeling courageous – boil the chicken then hand shred (same method as my Chicken Enchiladas), then marinate the pulled chicken and warm in a saucepan over medium heat for 5 minutes.  If you’re not feeling courageous, you could always buy a rotisserie chicken and shred that, then toss with the marinade and heat.  In any scenario, the result was great!  The Italian Beef Stew from Jan/Feb issue of Cooking Light was shockingly good.  Shockingly, because I almost never want to make *anything* from Cooking Light, but I keep taking the magazine for years on end.  Just remember to add your fresh herbs right at serving time, otherwise they’ll be browner than green.  So much prettier that way.  And of course tons of shrimp.  If you haven’t tried my Roasted Shrimp with Chimichurri sauce, you should.  It’s probably my most requested dish this year.  Roasting the shrimp is covered in this post, and you can find my favorite chimichurri recipe here.

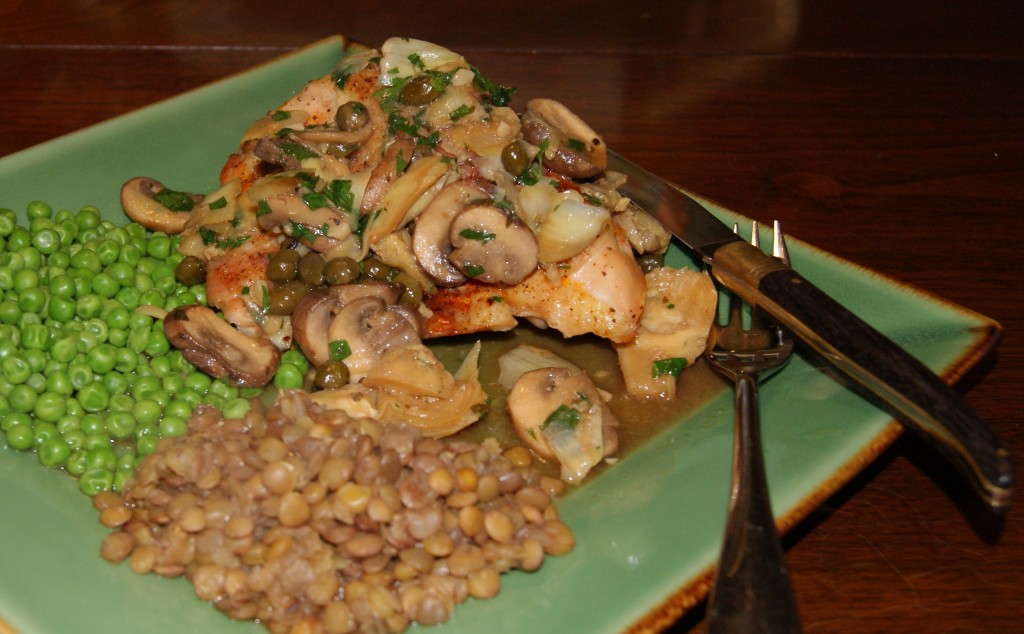
This chicken was a quick weekday night meal for us.  Roasting split breasts does take nearly an hour, but you can half that with your convection setting or use skinless, boneless for a similar meal in less time.  If you go that route – I’d use this style for braised chicken breasts.

Roasted Chicken Breasts with Artichokes, Mushrooms, and Capers

serves 3 adults

3 chicken split breasts

olive oil

kosher salt

fresh ground pepper

paprika

1 can artichoke hearts, rinsed, drained, and quartered

8 oz cremains mushrooms, sliced

1 tbsp butter

1/4 tsp oregano leaves

3 tbsp capers

1/4 c. Madeira wine

1/4 c. water

2 tbsp chopped Italian Parsley

Preheat oven to 425.  Place chicken breasts in a heavy bottomed skillet skin side up, then drizzle with olive oil.  Sprinkle with kosher salt, pepper, and paprika.  Roast chicken in oven approx 45 minutes, then start checking internal temperature.  The larger sizes tend to take just under an hour to reach an internal temperature of 165 degrees.  Remove from oven and cover your handle with a handle sleeve.  (You can use a towel or hot pad, but if you’re anything like me – you’ll suffer at least 3 burns in the process.  Save your skin and buy a sleeve!)

Remove chicken breasts to a cutting board to rest.  Heat skillet over medium heat to reduce the pan juices.  (You can skim any visible fat at this point if you’re counting calories!)  Use a wooden spatula to scrape up all the brown bits.  When juices are reduced by half (approx 3-5 minutes), reduce heat to low and add artichoke hearts, stir.  In a separate skillet, melt 1 tbsp of butter, 1/4 tsp kosher salt, and 1/4 tsp oregano leaves.  Brown cremini mushrooms until thoroughly browned, then remove from heat and set aside.  Add capers, Madeira and water to artichoke mixture, then stir until combined.  Heat 2 minutes, then add creminis and stir.  Just before serving, stir in chopped parsley, let rest no more than one minute.  Plate chicken breasts, then spoon sauce over the top.  Enjoy!

Print This Post

One of our tried and true staples back since my Round Rock days has been beer can chicken. First and foremost, who doesn’t love a recipe that starts off 1) Open beer, 2) Drink half… (I feel like Jim Belushi in the Johnsonville Brats commercial.) As summer lurks just around the corner, it’s time to get back to grilling. If the idea of roasting a whole chicken scares you – this is a super easy way to prepare it perfectly every time. The chicken is so tender and moist – probably the hardest part of your process is lighting your grill!
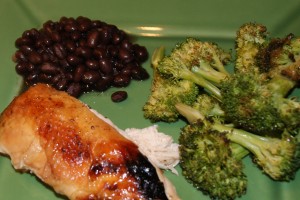
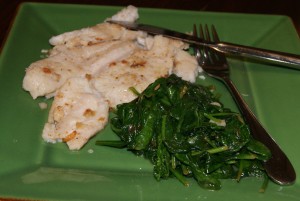
As for grill lighting, I’m becoming the master. After a tragic winter of failed attempts at chiminea lighting, I simply won’t be outdone by my grill. Incidentally, I can not believe I haven’t blogged about my awesome new grill/smoker combo. Mr. Richard bought this mammoth grill then only used it three times, at the end of the day, realized his vision was merely a pipe dream and lovingly passed the grill to me. Because of course I want/need a way to cook for a small army at one time. Back to the point, if you’ve been thwarted when lighting a charcoal grill, look no further. This method is absolutely fool proof. First, you need a chimney starter.  Next, you need lighter cubes.  You can light it using newspaper coiled into tubes in the bottom of the chimney starter, but if you live with someone like me, all newspaper is instantly recycled upon delivery.

To start, open the grate, pour in most of your charcoal into a small group, but no more than to about two briquettes deep.  My grill has two grates, if yours only has one, hopefully it will swing open halfway, otherwise, I don’t know what to tell you.  Place two lighter cubes on the remaining grate, then place the chimney starter on top.  Pour a small bunch (15? briquettes) onto the top grate of the chimney starter.  Light the cubes and then wait about 10 minutes until the large flames begin to die down.  Use a heavy potholder glove to dump the freshly lit coals onto the waiting pile in grill.  Wait about 20 minutes and you will have a piping hot fire, that’s hot, but not too hot.

If you’re a boy scout reading this, you’re surely laughing at my step-by-step breakdown of charcoal kindling.  And embarrassed by my necessity of gear and equipment.  But I’m neither a boy nor a scout (I don’t think that brief stint in Brownies counts) and even though I’ve done this a bunch of times, I still have to look up directions from Google.  Heaven help me, I could have never made it before the Internet, I’m certain I would have simply starved on the spot.

Beer Can Chicken on the Grill

serves 4

1 whole roasting chicken, giblets removed, rinsed, and patted dry

1 tbsp brown sugar

1 tbsp paprika

1 tsp garlic salt

1 tsp onion powder

1 tsp kosher salt

1/8 tsp cayenne

12 turns fresh ground pepper

1 beer in can

2 wedges lemon

3 cloves garlic, chopped

Prepare a grill.  Use the instructions above to light charcoal grill until coals are nearly completely white or turn a gas grill on medium high.  Open beer, I of course, prefer Bud Light, but please use your beer of choice.  Drink half the can.

Mix together all the spices in a small bowl, then rub all over the skin.  Squeeze the lemon juices into remaining beer and add chopped garlic.  Place beer on grill, then lower the chicken onto the beer can so the bottom of the drumsticks are standing tripod fashion on the the grill.  That’s it!  This will need to cook for about an hour on the grill, check for an internal temperature of 165, being sure not to press the thermometer to the beer can.  When you’ve reached this temperature, we use a combo of turkey forks to remove chicken and tongs to slide out the beer can and leave it on the grill.  Be gentle!  The chicken is unbelievably tender and the bones will pop right out!

Enjoy!

Print This Post

It’s possible my children are aliens.  Or perhaps that’s just the announcement of the 3rd snow day in a row talking.  Either way, the four year old cried at dinner that what he really wanted was flounder and wilted spinach.  It took me almost a quarter century to delve into seafood, and I’m still blaming the Scarsdale Diet.  Somewhere circa 1st or 2nd grade, I’m pretty sure my parents attempted something called the Scarsdale Diet at least a couple of times.  All I remember is fish with lemon.  Gross.  After googling, it appears you are only required to eat fish about twice a week, but that conjured hell on earth for 7 year old me.  Luckily my children were born with their father’s palate and will more often than not eat most anything offered.
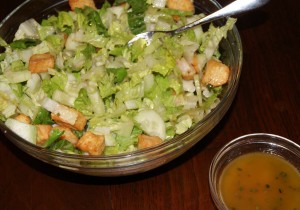
Now that I’m a mature, over quarter century old gal ; ) I love seafood.  It’s great for you, quick to prepare, and readily available in my neck of the woods.

Since I can’t eat at Neighborhood Services every night, I included my guess at their wilted spinach.  I love and crave their wilted spinach, but it’s been pointed out that at times I can be a bit fanatical.  At the end of the day, Popeye loves it so perhaps you will too.

Flounder Fillets

(serves 4)

1.5 lbs flounder fillets (more weight if they have skin on one side)

1 tbsp butter

3 tsp olive oil

kosher salt

fresh ground pepper

juice of one lemon

My flounder came in three fillets at this weight.  You can do this in all olive oil if you’re so inclined but it is such a mild fish, I think the butter makes a world of difference.  Rinse fillets and pat dry.  Season fillets with a generous sprinkling of kosher salt and fresh ground pepper on each side.

Heat a stainless skillet over medium high heat for 2 minutes.  Add 1/3 of your butter and 1 teaspoon of olive oil, then turn heat down to medium.  Allow butter to melt.  Brown one fillet for 2 minutes, then flip with a wide spatula.  Ensure that the edges are opaque before flipping.  Pour 1/3 of juice from one lemon after flipping, then brown second side for 1-2 minutes.  Add a 1/3 more of the butter and 1 more teaspoon olive oil then repeat process.

Serve and enjoy.

Lemon-Garlic Wilted Spinach

(serves 3)

The hardest part about wilted spinach is the sheer amount of spinach leaves you need to wilt.  When they cook they shrink so much that it’s easy to under prepare!  If you’re trying to cook a larger quantity you’ll need a HUGE skillet.  You only want the spinach to touch the surface for a very brief time.

1 tbsp olive oil

3 cloves garlic, sliced thinly

8 oz fresh baby spinach

1 tsp kosher salt

8 turns fresh ground pepper

Heat skillet over medium high for 2 minutes.  Add olive oil wait 30 seconds, then add garlic slivers cook about 1 minute until fragrant.  Add spinach leaves and flip continuously with tongs.  Sprinkle with salt and pepper, toss and pour lemon  juice.  Toss and serve when barely wilted – less than 2 minutes total cook time!

Print This Post

This simple salad has been one of my favorites of the year.  It requires you to step away from the pre-washed bagged lettuce, but I think Romaine hearts are one of the easiest lettuces to prepare.  If you can chop and wash celery, romaine hearts work the exact same way.  Adding sliced grilled chicken can quickly turn this salad to an entree, but on it’s own it makes a wonderful side dish for anything from spaghetti to fish and nearly anything in between.
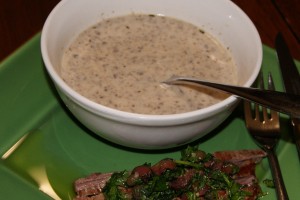
I’m probably going to have to break down and get a salad spinner this year and maybe even a toaster.  After completely exhausting myself last year hand making nearly everything from scratch, I’m looking for ways to bring back the KISS (keep it simple, stupid) plan to at least some of our meals.  When I make toast for my kids or husband I burn approximately six slices for every one that’s edible.  I know you *can* make toast in the oven, but apparently that’s not my strong suit.

As I was cleaning out my refrigerators this morning, I was trying to think of a system where I could *easily* keep track of what’s in my fridge and therefore what I can make.  It’s all well and dandy if I can see that I have a red bell pepper then use my search box to utilize it, but what if it falls to the bottom of the drawer?  Maybe in five years I can pay for my groceries with my iPhone, then automatically add ingredients and quantities to my kitchen database, then click a button on my website to suggest all the recipes I can cook for dinner.  Wouldn’t *that* be convenient? ; )

Homemade croutons from a stale baguette are sooooo much better, but a box will do in a pinch.

Chopped Romaine Salad with Lane’s Favorite Vinaigrette Recipe

(serves 8 as a side dish)

Leaves from 1 and 1/2 hearts of romaine lettuce

2 cucumbers

sea salt

fresh ground pepper

Parmesan cheese

croutons

Lane’s Favorite Vinaigrette

Rinse romaine leaves and gently pat dry.  Chop into 1-inch segments.  Peel cucumbers, then halve lengthwise and slice into 1/2 inch segments.  Gently sprinkle cucumbers with sea salt and  pepper.  Use vegetable peeler to shave slivers of parmesan cheese into Romaine lettuce.  Sprinkle with croutons, then add the seasoned cucumbers.  Top with vinaigrette and toss with tongs.

Lane’s Favorite Vinaigrette Recipe

(makes approx 1 cup of dressing)

3 and 1/2 tbsp red wine vinegar

3 and 1/2 tbsp lemon juice

7 tbsp olive oil

1 tbsp chives

1 tsp Murray River Salt

1/2 tsp garlic salt

1/2 tsp onion powder

12 turns fresh ground pepper

3 shakes dry mustard

Combine all ingredients, then whisk with a fork to combine.  Serve immediately after stirring.

Print This Post

With Soup Swap 2011 right around the corner, I’m back to blogging with my recipe for Cream of Mushroom Soup.  Mushroom Soup may well come in in more variations than any other soup outside of tortilla.  My recipe creates a thinner more broth than cream based soup packed with fresh mushrooms of many varieties.  While it wouldn’t be a suitable layer for a green bean casserole (too thin), it makes an excellent first course.  Probably the trickiest thing about this recipe is procuring the mushroom varietals.  I think Whole Foods usually has the best mushroom selection, though Dallas readers would find the very best selection from Spiceman’s 1410.
Speaking of Spiceman, there is an intriguing artisan grocery delivery service which recently sprung up in Dallas.  I haven’t tried the service yet, but I am curious about it.  Artizone’s model allows you to purchase artisan grocery products from multiple gourmet stores in one order for home delivery.  Some of the stores currently offering delivery through Artizone include, Spiceman’s 1410, La Duni, Flavors from Afar, and Scardello.  Since that’s a pretty impressive list of vendors, I’ll have to give it a shot.  I’ve used nearly every online grocery delivery service in existence back as early as the late 90’s, unfortunately they all tend to go bankrupt as soon as I’ve become accustomed to the service.  Here’s to hoping that Artizone’s niche service will break the trend!  If you’ve tried Artizone, send me a note!  I’d love to hear about your experiences.

This batch of mushrooms came from Central Market.  They seem hit or miss to me on what types of fresh mushrooms they will have in stock.  The varieties don’t particularly matter, I’ve used all sorts over time.  I look for the most tender mushrooms, (think of the opposite of the creminis, they’re the only meaty mushrooms I choose).  This batch used hedgehog, brown clamshell, oyster, and creminis.  At least two of those are described as being similar in flavor to chanterelle mushrooms, which are my all time favorite mushrooms, but currently out of season.

Cream of Mushroom Soup

(approx 3 qts, serves 7-8 bowl size, 10-12 cup size servings)

8 tbsp butter

1 large yellow onion (not sweet!), chopped

4 stalks chopped celery

1/4 tsp cayenne pepper

6 cloves garlic, chopped

1/3 lb. fresh oyster mushrooms, chopped

1/3 lb. fresh Hedgehog Mushrooms, chopped

1/3 lb. fresh Brown Clamshell Mushrooms, chopped

1 lb. cremini baby bella mushrooms, sliced

1 tsp dried thyme leaves

kosher salt

fresh ground pepper

3/4 c. Courvoisier

6 c. chicken broth

1 c. heavy cream

Heat a large stock pot over medium heat.  Melt 4 tbsp of the butter then add the onions, celery, and cayenne.  Cook over medium heat for 5 minutes, then add the garlic.  Cook 2 minutes, then add the remaining 4 tbsp butter and all the mushrooms.   Sprinkle the mushrooms with thyme, 1 tsp of kosher salt, and 10 turns fresh ground pepper.  Raise heat to high and brown about 8-10 minutes, stirring every minute or so with a wooden spatula.  Add Courvoisier and cook until liquid becomes thick and syrupy, 3-4 minutes.  Add stock, then bring to a boil.  Reduce heat to low, and simmer uncovered for 15 minutes.  Use a ladle to transfer 1/3 of  soup to a blender to chop.  Pour to a clean bowl, then repeat with the last two portions.  Return soup to stock pot.  Add cream, cook 5 more minutes, then taste and adjust seasonings.  I added an additional 1 and 1/2 teaspoons of kosher salt and a few quick turns of pepper.  Enjoy!

Print This Post

Mashed Potatoes Recipe

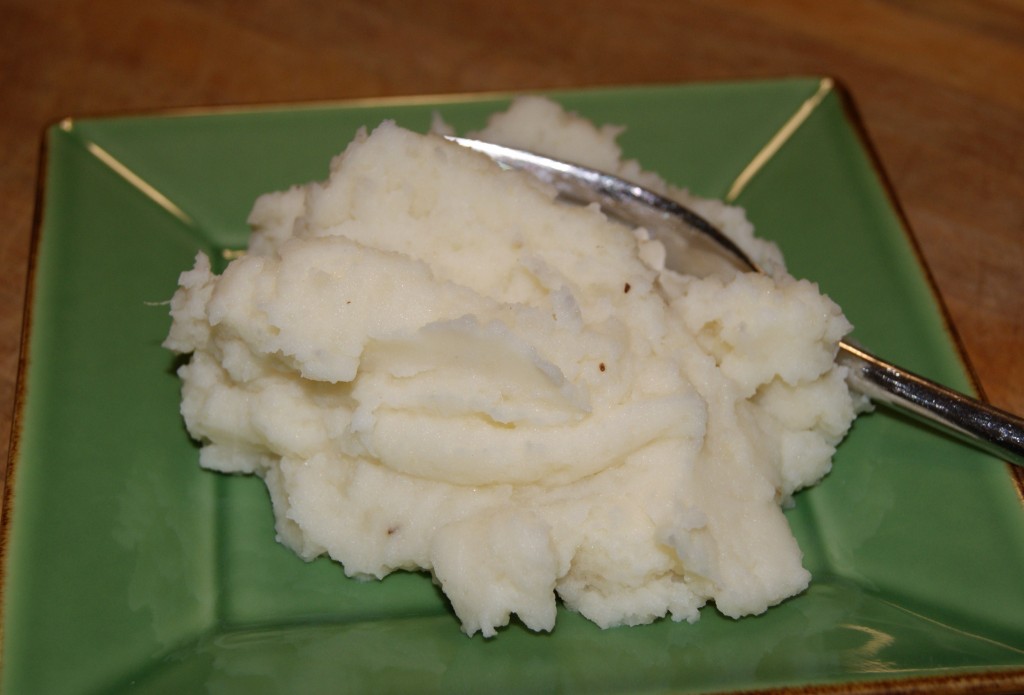
I never knew so many people struggle with preparing mashed potatoes at home!  I frequently hear from readers or friends that they consistently fail with mashed potatoes.  And conversely, people (especially my friend Rachel) claim to crave my mashed potatoes.  Back in the hey day of my Sunday dinners, I used to make mashed potatoes for 20 every single weekend.  Then life got busy, I had two children, and they fell off my radar for a bit.  This is the most basic recipe, but you can fancy them up all sorts of ways.  You can roast a whole garlic, then mash it, mince it, and mix it in.  You can add a couple of tablespoons of horseradish sauce for an extra spicy kick.  You can chop in fresh herbs – either basil or thyme leaves are especially nice.  You can mix in blue cheese for a creamy pairing with steak.  You get the point.  The Permutations and Combinations are endless.
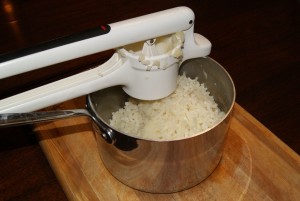
In keeping with my Thanksgiving theme, here are my Top 5 Mashed Potato Tips for home cooks.

  1. Russet Potatoes.  You may know them as Baking Potatoes.  These are the ones you see in the photo.
  2. Start with cold water from the tap.  Place potatoes in cold water, then turn on heat.
  3. Buy a potato ricer.  If you don’t have a potato ricer use a slotted spoon, then ask for a ricer for Christmas.
  4. Use real butter.
  5. Use real cream.  You can use milk it’s fine, I do it, too.  But if it’s Thanksgiving, use the cream, then go run some stairs.

One of my Monday Night cooking class participants pointed out that the idea of mashed potatoes at Thanksgiving was really odd to her.  Truth be told, I didn’t grow up with mashed potatoes at Thanksgiving either.  I think we had sweet potatoes and rice.  But if you’re already making gravy, I consider it a crime against humanity not to provide mashed potatoes as a vehicle for gravy delivery.

In other news, I woke up to an email from an email from a casting director informing me of a casting call for a new Food Network TV show.  Unfortunately, they weren’t asking me to have my own half-hour instructional cooking series where I could wear snappy outfits, cook in a beautiful and well equipped kitchen set, all while engaging enthusiastically with my viewers, and creating my own signature tag line while you watch me lovingly and debate the merits of my latest hairstyle.  What they *are* looking for is a team of two people who are dreaming of opening a restaurant.  She asked if I’d post the information on my blog, so if this sounds like you, here’s the casting call info.

Sunday, December 5, 2010

10am-1pm

Westin Park Central

12720 Merit Drive, Dallas, TX 75251

If you haven’t yet had a chance to hop on over to Marx Foods site and Vote for my Beef Tenderloin with Calamarata Pasta in Porcini Mushroom Sauce.  They have all sorts of contests going on while you’re there to win some magical bounty of your very own.  Just follow the link, click Vote, and then click the button next to DinnerandConversation.  As always I thank you for your support and look forward to providing you with as many fresh recipes as I possibly can!  Poll will be open through Friday the 19th!

Mashed Potatoes Recipe

4 big, giant Russet Potatoes

4 tbsp butter

3/4 c. heavy cream

1 tsp fine ground sea salt – or even better Murray River Pink Flake Salt

10 turns fresh ground pepper

Peel potatoes with your trusty vegetable peeler.  Slice in half length-wise, then place the cut side down, and slice into 1 and 1/2 inch segments cross-wise.  Place cut potatoes in a large pot, then cover with water until the water reaches 2-3 inches above the top of the potatoes.  Turn heat on high and cook uncovered.  It takes approximately 55 minutes for this quantity to become fork tender.  You don’t want them to completely fall apart, but you do want the fork to easily pierce and break a piece into two pieces with a gentle application of pressure.  Drain the potatoes into a colander.

Use a slotted spoon to transfer cooked potato pieces to your potato ricer.  Rice back into pan.  Bury the butter into the riced potatoes covering it completely.  Wait about 4-5 minutes, then add cream and turn heat half-way between low and medium.  Gently fold in cream and butter to potatoes, then season with salt and pepper.  Taste, then season again.  If you’re using kosher salt, wait about two minutes before adding additional salt for the kosher salt to dissolve, then stir and taste.


Print This Post

Thanksgiving is truly one of my favorite holidays.  I love the food, the break from school or work, and the true opening night to the holiday season.  I love a party, and when are there more parties to attend than the holidays?  Nearly all of my Thanksgiving repertoire can be found on my website in one place or another.  I’m going to post Turkey, Gravy, Stuffing/Dressing, Haricots Verts with Almonds, Mashed Potatoes, Pumpkin Pie and Bourbon Pecan Pie this week so they’ll all be available at the top of the page for your Thanksgiving prep work – no searching required.  Get your aprons out and your Chef hats on!

My top 5 turkey rules for home cooks.  Your mileage may vary, but these are the rules I live by.

  1. I don’t brine any more.  It destroys the gravy.  Brining is thought to lead to a moister bird, but follow the other rules and you won’t have those issues anyway.
  2. Do not attempt to prepare the turkey straight out of the refrigerator.  I let mine rest for an hour, otherwise the temperature change from fridge to oven is too shocking!
  3. High Heat at the start, then reduce the temperature.
  4. Use real butter.  It just makes for better flavor.
  5. Let the turkey stand at least 15 – up to 30 minutes before carving.

Perfect Roast Turkey

16 lb turkey

kosher salt

fresh ground pepper

2 tsp herbes de provence, (I like Morton & Basset the other brands contain fennel which is overpowering to me)

4 cloves garlic

1 and 1/2 tbsp melted butter

paprika

2 tbsp butter

Bring the thawed turkey out of the refrigerator approx 1 hour before cooking to bring closer to room temperature.  Preheat oven to 425.  Rinse turkey with water, inside and out.  Remove neck and giblets from the inside of the turkey.  Pat turkey dry with paper towels then place on a V-shaped Roasting rack in a roasting pan.  Inside the turkey cavity, add two teaspoons kosher salt, 20 turns fresh ground pepper, Herbes de Provence, and garlic cloves.

Drizzle skin with melted butter, then sprinkle generously with salt, pepper, and paprika.  Roast in oven for 30 minutes.  Use additional butter to rub on skin, then reduce oven temperature to 325.  Roast for about 2 hours longer – rubbing butter on skin every 30 minutes.  Begin checking internal temperature in thick part of thigh and breast after total cook time of two hours.  Turkey is done when the internal temp reads 175, be sure to check with thermometer between leg and thigh as well as in thickest part of the breast.  Tilt turkey at an angle to pour cavity juices into drippings.  Remove turkey to a cutting board to rest.

Turkey Gravy Recipe

Drippings from Roast Turkey

All Purpose Flour

2 qts turkey stock

Kosher Salt

Fresh Ground Pepper

I come from the school of thought that it’s impossible to have too much gravy.  So I never reduce down from the amount of pan drippings, but you can – the important thing is to be close to a 1:1 ratio of drippings to flour.  With a bird of this size, I usually have around 1/2 c. drippings.  Pour drippings into a measuring cup, then pour back the quantity you want to your roasting pan.  Position the roasting pan over two burners over medium high heat.  Add an equal amount of flour, then whisk over medium high heat until browned and paste like, about five minutes.  The longer you brown your flour, the darker your gravy will be.  Slowly! (this is key to preventing clumps) add turkey stock, whisking constantly to combine.  Increase heat to high.  Bring to a boil whisking constantly until thickened.  If gravy is too thick add additional stock, if gravy is too thin, keep boiling to thicken.  Season to taste with salt and pepper.

**If you have troubles with your gravy being lumpy, I have another method posted in this Turkey Recipe.  It involves shaking the flour with stock or water in a water bottle to combine before adding to the drippings.  The flavor is not quite as rich and deep as with browned flour, but you may find it a bit easier of methods.

**Turkey Stock can be made or purchased.  I’d recommend Kitchen Basics brand – in Dallas available at both Central Market and Albertsons.  I haven’t seen it at Tom Thumb yet, but I’d imagine they may well have it during season.  You can sub chicken broth will good result, but go for the turkey if you can find it.

Print This Post

So this one goes out to Mr. Antione.  And my absurd love of rap music.  What?  Who?

First things first.  Mr. Antoine was my 9th grade biology teacher.  He did an entire 6 weeks in the spring on edible plants.  (And 6 weeks in the fall on *in*edible, if memory serves.)   Legendary.  At the time I thought it was all a little bit insane – the plant identification lab, hiking through the field behind RHS in search of edible bits, cooking in class, staying after school to work on extra identification practices with friends…  Hell, now I’m irritated.  Why can’t we go to 9th grade when we’re 30?  That sounds like fun now.  Sadly, Mr. Antione passed away a few years back.  I have no idea what the current 9th graders are studying back at RHS.  I’m fairly certain they’re missing out on the morel mushrooms sauteed in tons of butter lesson.  Rest in peace, Mr. Antione, I feel certain you would have loved this recipe.

And to the rappers, well, I owe you cognac.  Sure, I don’t think think I could possibly consume a glass of it, but I’m glad *you* can.  And I love to cook with cognac.  Even more, I just love to say Courvoisier in my rapper voice.  I thought about linking to the youtube video of the song in question, but my parents read this website.  And on the off chance that one of them might accidentally click on that link, I’m fairly certain I’d be grounded.  Or censured.  Or both.  Either way, this article sums up pretty well how the hip hop music culture has embraced Cognac and greatly expanded its demand.  I think subliminally, rappers have led me to owning 3 different brands of cognac in my liquor cabinet.

The photographed servings were enormous, so I’m editing the recipe a tad to a more reasonable amount.  I promise it will taste better if you prepare while listening to a hip hop station on Pandora.  Or if you need me to, I can still make you a mix cd.  Just ask my sister, Allison.  And if you’re just not into all that, throw on some Michael Bublé, grab a big glass of red wine and own your evening.

Beef Tenderloin over Calamarata Pasta with Porcini Mushroom Sauce

serves 4

.75 oz dried Porcini mushrooms

1 and 1/2 c. boiling water

3 tbsp butter

1/2 red onion, finely chopped

2 cloves garlic, chopped

1 c. Courvoisier (or cognac of your choice)

2 approx 8oz beef tenderloin filets

kosher salt

fresh ground pepper

olive oil

2/3 c. sour cream

1 and 1/2 c. heavy cream

8 oz dried Calamarata Pasta

1 tbsp lemon juice

1/2 tsp Black Truffle Salt

Add dried mushrooms to boiling water and let soak for 45 minutes.  Drain, rinse, soak another 5 in boiling water.  Drain, then pat dry with towels to reduce excess moisture.

Melt butter in a saute pan.  Add mushrooms, onions, and garlic to pan, then cook 3 minutes over medium heat.  Add Courvoisier and let continue to cook.  Start you fillets, but be prepared to come back to your sauce when your fillets hit the oven.

Preheat an oven to 450.  Generously season fillets with kosher salt and fresh ground pepper.  Heat a stainless saute pan over medium high heat for about 2 minutes.  Add olive oil, swirl, then quickly add fillets.  Brown on all sides, about 6 minutes in total depending on your thickness.  Then move to oven, cook to an internal temperature or 138 in the thickest part.  Start checking temp after 6 more minutes. Set a timer, you’re going to be busy.  When fillets hit the proper temp, move to a cutting board to rest.

To the mushroom sauce, add sour cream and cream.   Cook over medium high heat, stirring every two minutes with a spatula.  Do not stress about this, you want to cook and then cook it some more.  If it looks bubbly and like it’s cooking onto the pan, good.  Stir gently and cook some more.

Meanwhile, bring a large pot of water to boil – at least 6 cups.  Add 2 teaspoons kosher salt once boiling.  Stir, add pasta, then boil for about 16 minutes then check the tenderness by taste.

As the mushroom sauce begins to develop a dark color and a thick texture, add the lemon juice and the truffle salt.  Stir, then continue cooking over medium.  You want the sauce to continue bubbling.

Drain the pasta when ready, then fold into the mushroom sauce.  On your cutting board, slice fillets into strips, then top a pasta serving with tenderloin in a fan pattern.  Top with a gentle sprinkling of chives.  Cheers.  And Pass the Courvoisier.


Print This Post

« Newer Posts - Older Posts »