Feed on
Posts
Comments

Cherries Jubilee Recipe

IMG_2296 (2) 
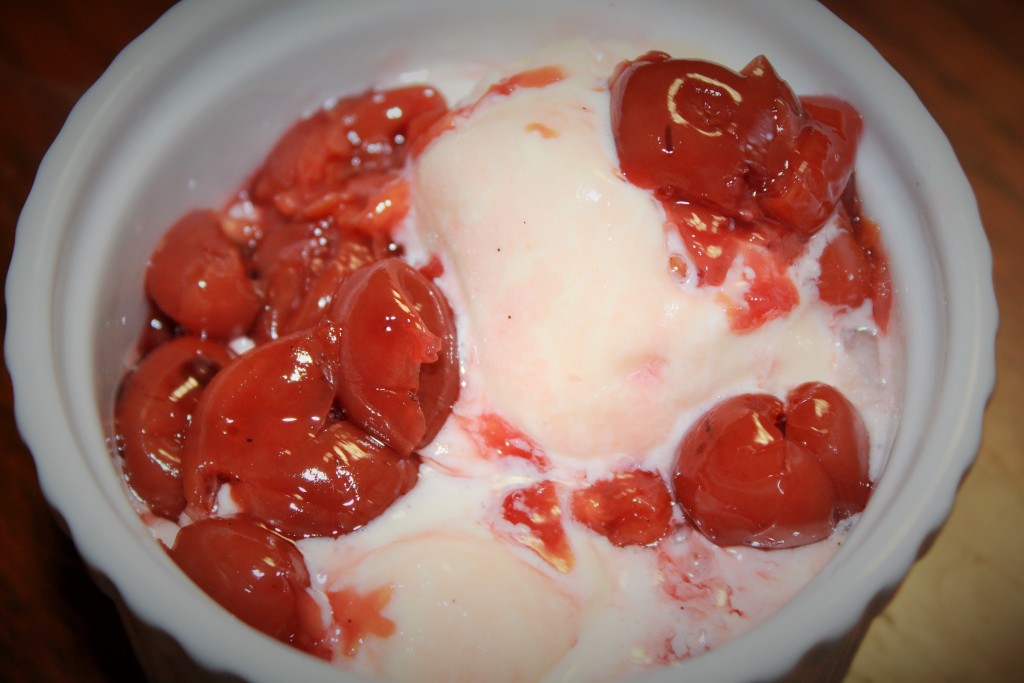
Today just felt like the right day to light something on fire.  I love tart cherries.  I’m a huge fan of cherry pie, but I didn’t feel like making pie crust.  Cherries Jubilee came to mind and this recipe was born.

My very first grown up solo holiday was Thanksgiving of my freshman year in college.  I went to visit my sister in Houston, who was experiencing her first Thanksgiving in her First Big Grownup Apartment.  She was toiling away a billion hours a week as an investment banker and that felt like the only day she was ever off work that entire year.  We planned an elaborate Thanksgiving menu and started the day off right with Amaretto Sours at 9:30 in the morning.  The meal went off flawlessly, except we never could get the jubilee aflame.  I can’t remember the exact method to our madness, but over time I’ve perfected my method for lighting things on fire.  Warming the alcohol helps.  Also, light the liquor separately, then add to your fruit mixture.  Even if our dessert wasn’t perfect that day, we were young enough that no one cared about the extra alcohol content in the dessert.  And that was the day, I realized I couldn’t wait for my very own Big Grownup Apartment complete with my own personal kitchen to create fabulous dinners and holiday jubilation.

The cherries jubilee was a huge hit tonight and we’ve imagined all sorts of variations including boozy milkshakes and Cory’s request for a crumble topping.  Best of all this recipe is super easy to put together and full of ingredients easy to keep on hand in your pantry.

Cherries Jubilee Recipe

serves 10 

3 cans tart cherries in water

1/2 c. sugar

1 whole vanilla bean

1/2 tsp almond extract

2 tsp cornstarch

1/2 c. Courvoisier or other cognac

Open three cans of cherries, reserve 1/2 c. of cherry liquid.  Pour remaining liquid, cherries, and sugar into a saucepan.  Cut open vanilla bean with a paring knife, then scrape the seeds into the cherries.  Add the whole bean and the almond extract.  Heat over medium high heat fifteen minutes.

In a small bowl, add the cornstarch to the reserved cherry juice.  Stir with a fork until dissolved then add to warmed cherry mixture.  Stir with a wooden spatula taking care to scrape bottom and sides of saucepan.  Heat over medium heat for 3-4 more minutes until thickened, then remove from heat.

In a skillet, warm cognac over medium low heat.  When it begins to boil, remove from heat and use a long handled fireplace style lighter to light the cognac aflame.  This will ignite to a big flame!  Carefully pour into warm cherry mixture.  Then gently blow out flame and stir to combine.  Remove the vanilla bean and discard.

Serve over vanilla ice cream.  Enjoy!

Print This Post

IMG_2005

I wanted to try the Forbidden Rice, because – hello, it’s Forbidden.  And I’m a rebel like that.  Sort of.  Not really. Okay, only sometimes.  The black rice looks so shocking in the package next to all those other bland and boring looking grains.  It’s almost impossible to pass up.  Allegedly, it was forbidden due to it’s rarity and super food qualities – food only fit for an emperor.  Well, as Empress of Casa Clark, and I found it in the distant land of the grains aisle at Central Market.  In addition to the unique color, forbidden rice is high in protein (for a grain), super high in antioxidants and minerals.  I love that it offers a more rounded nutritional option, but mostly I chose it for the presentation and the mouth feel.

Forbidden rice is chewy.  I’d call it both scented and reminiscent of walnuts.  People use it for everything from breakfast to rice pudding, but I mostly relegate my rices to dinner and maybe once in a blue moon, lunch.  It makes an excellent presentation bed for a main course and another variety option for children and adults.  For this meal, Forbidden Rice serves as a bed for Flank Steak and Herb Sauce, one of my family’s favorite and most requested meals.  Usually I serve it with jasmine rice or lentils – both are delicious, but can grow mundane.

Forbidden Rice Recipe

serves 6

1 and 3/4 c. water

1 tbsp olive oil

1 tsp kosher salt

1 c. forbidden rice

Bring water to a boil, then add oil, salt, and rice.  Return to a boil, then cover and reduce heat to low.  Simmer rice for 30 minutes, then remove from heat.  Let rice stand, covered for another 5 minutes, then fluff with fork and serve.

Enjoy!

Print This Post

IMG_1995
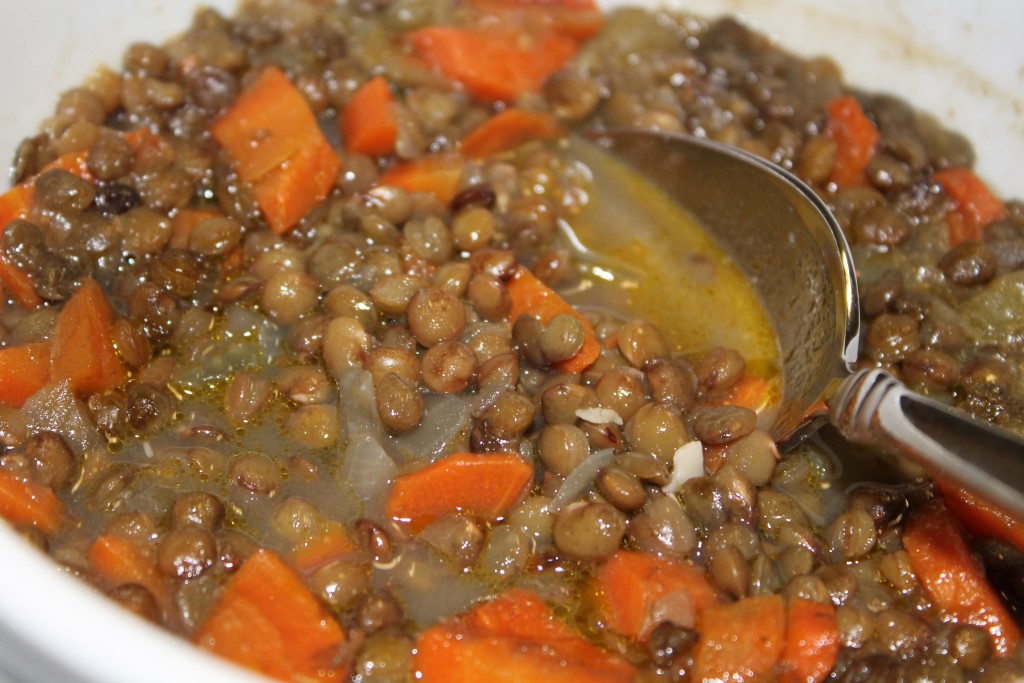
I would make a wretched vegetarian, but I’m cooking/preparing food for a client doing the Standard Process Cleanse this month. The general idea of this cleanse is consuming all vegetables (at least 1/2 consumed raw) and fresh fruits with a few allowances for small servings of psuedo-grains (lentils or quinoa only), scant amounts of healthy fat options, plenty of fresh herbs, and thank goodness – chicken stock.

I had a brief stint as a vegetarian, about age 17, which was resoundingly squashed by my mother, who was then also functioning as my personal chef.  In her mind, this was merely a small act of temporary insanity on my part. Hers was an act of true love.  Surely I would have died of malnutrition or at least rickets, since my then diet included very few vegetables, no legumes, and a limited grain palate.  I think I was planning to live on white bread and ketchup. Oy, teenagers.

Starting in my mid 20’s, I discovered lentils.  We mostly eat them straight, simply cooked in chicken broth and topped with a very modest amount of real butter.  Our children prefer to smother them in Parmesan courtesy of the Italian New Year’s Day Tradition.  Since Parmesan, all Dairy, meat based main dishes for variety, and basically anything fun ; ) are out for my client, this lentil soup was born.

Lentil soup may not be the prettiest dish, but it’s packed with nutrition and can be quite satisfying.  Lentils are very high in protein, fiber, and iron.   When I follow any kind of nutrition plan, I aim for the 30-30-40.  30% calories from protein, 30% calories from fat, and 40% from healthy carbs – meaning mainly vegetables.  It’s hard to do, but I feel confident that this the best plan for *me*.  Just me.  We all work within our own science of interpretation.  Lentils are about the only thing outside of a meat based entree that comes close to this 30-30-40 ratio.  When 1 cup is prepared in chicken stock with 1 tbsp of butter, it comes in at 24-31-45.  It’s the only thing I can think of that comes this close without adding some lean meat or egg whites to up your protein percentage of calories.  Therefore, I deem lentils a super-food.

If you can satisfy or nearly satisfy multiple nutrition programs – you’re doing something right.  As a bonus, all three of my kids eat lentils.  And both of us.  If your kids won’t, encourage one bite with a heaping amount of Parmesan if they’re into it.  If they’re still out – move on.  I’m living proof that you can have horrible childhood dietary preferences and become a healthy and varied adult foodie.  Plus there’s just too much else to worry about in life, Food Battles should not be a thing.

Lentil Soup Recipe

makes about 6 qts or 12-15 servings

1 whole garlic

olive oil

2 organic white onions

8 organic carrots

8 stalks organic celery

4 tbsp olive oil

1 tbsp kosher salt

3 1/2 c. French Green Lentils (french green are more expensive, but hold their shape. Brown lentils will not affect flavor)

1 tbsp Ground Cumin

1 tbsp Ground Coriander

3 1/2 qt (14 c.) Homemade Chicken Stock – or Kitchen Basics if you’re in a pinch

2 bay leaves

8 sprigs fresh thyme

1/8 tsp cayenne pepper

20 turns fresh ground pepper

Preheat oven to 350.  Brush whole garlic with olive oil.  Roast garlic in a small skillet until soft, approximately 45 min. After placing garlic in oven, rinse, peel, and dice, onions, carrots, and celery.  Heat an 8qt stock pot over medium high heat.  After heated, add the 4 tbsp of olive oil and heat for 1 minute.  Add diced vegetables and season with kosher salt.  Saute vegetables, stirring occasionally, for about 5 minutes.  During this time, pour measured lentils into a strainer and rinse.  Add lentils to stock pot, stir to combine.  Season with the cumin and coriander, then stir and let continue sauteing for 2 more minutes.  Pour in chicken stock, add bay leaves, thyme, and peppers.  Add more cayenne if you’re not cooking for children, perhaps up to 1/2 tsp depending on your level of heat tolerance.  Lop the top off that roasted garlic, and squeeze out the insides whenever your 45 min garlic timer goes off.  (Note*** use timers!  Cooking is actual science, people!)   Bring to a boil, then simmer for 40 minutes.  Enjoy!!

Print This Post

IMG_1963
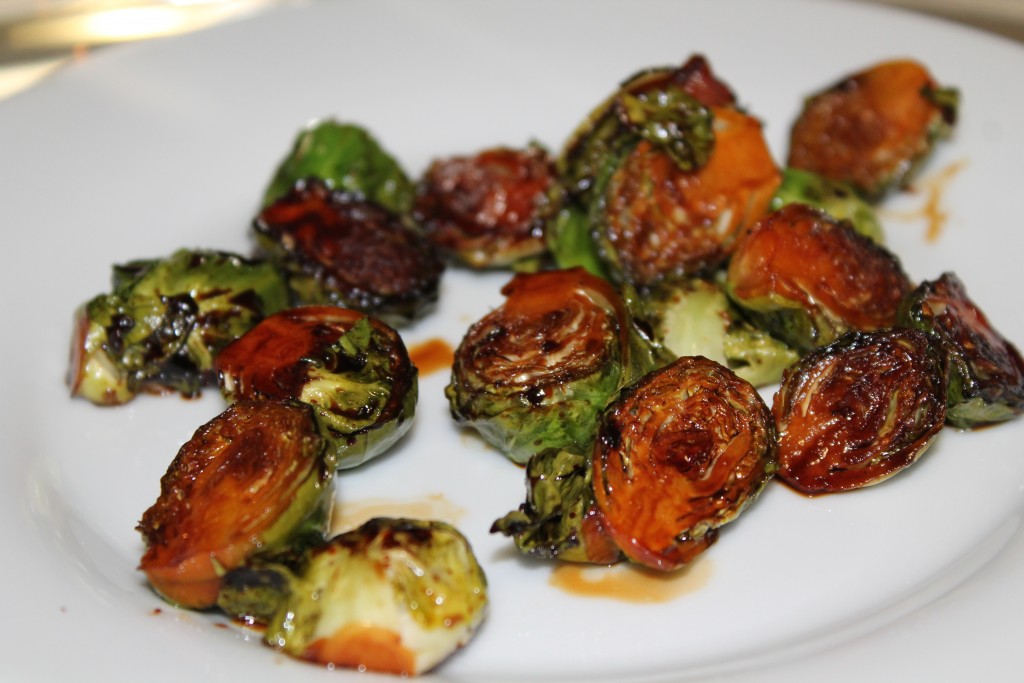
The brussels sprout is the perennial childhood dinner table torture device, perhaps only second to the lima bean.  I have to admit they are not my favorite vegetable either.  I’ve been recipe testing brussels sprouts for 3 full years.  In fact, this vegetable almost completely took me out of recipe writing all together.  I probably should have moved on and just avoided them, but they are my sister’s and several friends’ favorite food.  They’re also healthy and very en vogue.  So I persevered and have made and tossed out more brussels sprouts than you can imagine.  I’ve served the results to multiple test subjects to great reviews – therefore I’ve determined in terms of brussels sprouts, I am not a impartial judge.  Most roasting recipes call for cooking brussels sprouts for 40 minutes or longer at high heat, but then they just taste like burned mush to me.  The first recipe is my roasted version which has fared very well in taste tests.  The following recipe is the way both Quentin and I prefer them.  They are very similar, but in the end it comes down to texture.  If you like a melt in your mouth flavor, go with the roasting method.  If you prefer a savory crunch, try the saute method.

Roasted Brussels Sprouts Recipe

serves approx 4

1 lb. brussels sprouts

3 tbsp soy sauce

2 tbsp rice vinegar

2 tbsp olive oil

1/4 tsp kosher salt

12 turns fresh ground pepper

Preheat oven to 375.  Rinse the brussels sprouts.  Trim the ends, and half lengthwise.  Spread the brussels sprouts over a half sheet pan.  They should not be crowded and touching, but if you reduce the quantity, also reduce the size of your roasting pan/cookie sheet to prevent burning.  Combine the remaining ingredients and vigorously whisk to combine.  Pour sauce over sprouts and shake pan to coat.  Roast in oven for 25 minutes.  Use a spatula at 12 minutes to flip the sprouts.

Enjoy!

Sauteed Brussels Sprouts Recipe

serves approx 4 

1 lb. brussels sprouts

3 tbsp soy sauce

2 tbsp rice vinegar

2 tbsp olive oil

1/4 tsp kosher salt

12 turns fresh ground pepper

Rinse the brussels sprouts.  Trim the ends, and half lengthwise.  Heat a skillet or a wok over medium high heat. Spread the brussels sprouts over skillet.  Combine the remaining ingredients and vigorously whisk to combine. Pour sauce over sprouts stir with wooden spatula to coat.  Saute until sauce has reduced and looks syrupy approx 10 minutes, stirring periodically.

Enjoy!

Print This Post

Sugar Cookie Recipe


IMG_1955
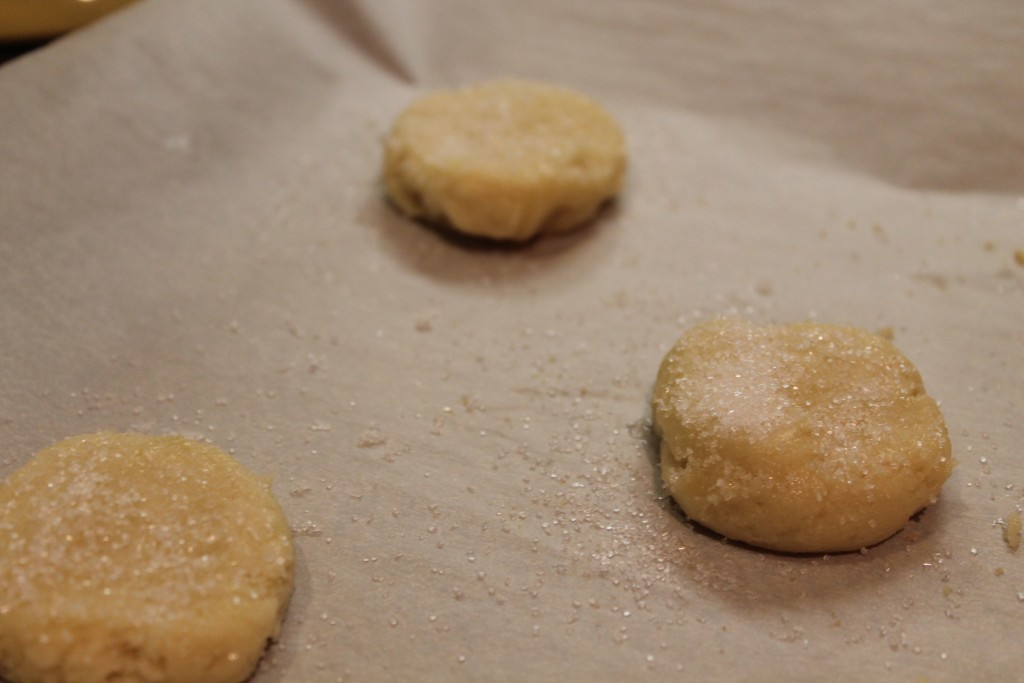
Sugar cookies are a universal childhood favorite.  I’ve yet to meet a little who can turn one down.  But these sugar cookies are a treat for the grownups, too.  My husband swears they go well with Bourbon.  My friend, Angela, and I were discussing cooking at lunch the other day.  She’s a trained chef, amongst many other hats, yet she was confessing that she doesn’t really enjoy baking.  Cooking on the other hand, she loves, because it allows for so much more flexibility and interpretation.  I admit fully to sharing similar opinions.  It’s a lot easier to taste a chicken entree and think – you know what this needs?  Mushrooms.  Mushrooms would make this a next level chicken dish. Baking, conversely, is more challenging.  When your recipe starts 2 and 1/4 c. flour, 1 and 1/3 c. sugar, 1 tsp baking soda, 1 tsp baking powder…… it’s a little tricky to just fly off the cuff and change that business up.  That said, here’s what I *Always* change when baking.  If the recipe called for vanilla extract, I double it – every time without question.  If it calls for fresh lemon juice, ditto.  The only other big adaptations, lie in temperature, cook time, and cool time.  So – boring, maybe.  You’re not invoking magical ingredients to change the entire flavor profile, but desperately important.

I’ve grown to love baking.  The science of it.  I love making adjustments and making it work.  Cooking dinner will always be my first love, but baking – I see you over there – and I will rise to meet your challenge.  Mostly, because I’m really excited about my new oven.  The old one was on it’s last leg, and it’s impossible to maintain oven temp when your door won’t close completely.  Which points out the other most critical rule in baking – Do you have an oven thermometer?  Cause I bet you need one.  I’ve cooked in kitchens all over town and all over this country and even the fanciest ovens often are off by at least 25 degrees.  (I’m looking at you Vikings everywhere.)  In cooking, no big deal.  When baking?  I’d argue that matters.

Sugar Cookie Recipe

(adapted from Martha Stewart )  makes approx 32 cookies

3 c. White Lily All-Purpose Flour (when baking always White Lily!)

1 tsp baking soda

1/4 tsp kosher salt

1 and 3/4 c. sugar

1/4 c. light brown sugar

zest  from 1 lemon

2 sticks butter, softened (1 c.)

2 large eggs

juice from zested lemon (approx 3 tbsp)

2 tsp vanilla extract

sanding sugar (pics were made with sanding sugar, but I prefer the large crystal shimmer or sparkle sugar)

Preheat your oven to 350 degrees.  In a large bowl, sift flour, baking soda and salt.  In your stand mixer with the paddle attachment, combine sugar, brown sugar, and lemon zest.  Mix on low speed, then add butter.  Increase speed halfway, and mix until light and fluffy.  Add eggs, lemon juice, and vanilla extract.  Reduce speed to low, then add dry ingredients and mix until combined.

Cover a half sheet pan in parchment paper.  Use a dinner spoon, to scoop then use your hands to roll into one inch balls onto baking sheet in a 2-1-2-1-2 pattern.  Fill a bowl with very hot – nearly boiling water.  Dip spatula in hot water, then flatten the tops of the cookies as shown below.  If you skip the hot water, your spatula will stick.  Sprinkle with sanding/shimmer sugar.  Bake in oven for 15 minutes, let rest on baking sheet 2 minutes, then place on cooling racks.

IMG_1933

Enjoy!

IMG_1932

Print This Post

IMG_1936
This shredded chicken recipe may be the easiest recipe I make.  It makes a great filling for a taco bar, topping for salads, nachos, enchiladas, quesadillas, or appetizers.  You can cook it as written below as dinner for your family or scale it to serve large parties.  The simplicity does not equal the resulting flavor.  It can easily be prepared a day in advance and reheated, just leave extra stock in when shredding or reheat with a small infusion of more stock if chicken seems a bit dry.

3 skinless boneless chicken breasts, approx 1.75 lbs

1.5 c. chicken stock (approx! see below)

2 tsp cumin

1 tsp granuated garlic (I prefer Morton & Basset for all my spices)

1 tsp kosher salt

1/8 tsp chili powder

1/4 tsp paprika

Place chicken breasts in a crock pot.  Add chicken stock to almost cover your chicken, but not quite.  The amount of stock required will depend on the quantity of chicken and the size of your crock pot.  Add seasonings, then stir to combine.  Cook on high for 4 hours or low for 8 hours.  The timing (as with most crock pot recipes) is very forgiving and flexible.  Yay for convenience!  After cook time, check the amount of liquid remaining in crock pot.  If you had a small amount of chicken and a large crock pot, you will still have a lot of liquid left.  Use a coffee cup to remove a cup if necessary, and reserve for later.  You can always add some back if chicken looks dry after shredding.  Shred chicken using 2 forks.  Taste and adjust seasonings with salt and pepper to your preference.

Serve shredded chicken with warm tortillas, queso fresco, guacamole, and salsa for a taco bar, or with lettuce leafs for low-carb wraps.  Enjoy!

Print This Post

Spanish Rice Recipe

IMG_1916
Spanish rice is that loose term for any rice dish that is sort of red and is typically served alongside Mexican food.  My college friend, Marti, used to get giant casseroles of Spanish Rice from her childhood nanny which fed people for days.  Locha’s rice was legendary.  Or maybe we were just hungry and almost no one knew how to cook at that point in time.  Growing up in Peoria, Mexican food was scarce so Spanish Rice was never really on my radar.  Over time several people have told me their version of this recipe and strangely for years it was really tricky to master!  My rice was either bland or crunchy or wet or just boring.  This version is my go to and a compilation of many along the way.  I feel strongly about using jasmine rice and the importance of heating your stock before adding to the rice.

This recipe is party size – perfect for a large gathering, you can scale it down, dividing it by 4 and using a smaller pan (think cake pan size like 8×8).  If you use a glass pan, versus a disposable aluminum foil one, note that cook time may be a little bit longer.  Great as a side with chimichangas, enchiladas, crunchy tacos, or fish tacos.

Spanish Rice Recipe

serves 20

2 tbsp olive oil

large white onion, diced

3 c. jasmine rice (I prefer the texture on this rice over any other)

2 cans diced tomatoes

4.5 c. chicken stock

3 tsp kosher salt

Preheat oven to 400.  Heat a stainless steel skillet over medium heat.  Add olive oil, heat until fragrant.  Add diced onion, saute 4 minutes.  Add rice, stir with a wooden spatula to combine, then saute another 5 minutes.  Pour rice mixture into bottom of a large disposable aluminum foil pan, either a deep half-size steam table pan or a deep, large lasagna pan will work.  The size on these pans will be something along the lines of 12 x 10 x 3 or 13 x 9 x 2 3/4. Drain tomatoes and pour over rice.  Heat chicken stock until steaming – either in glass in the microwave or in a sauce pan on the stove. Pour hot stock over the rice mixture, stir, and sprinkle kosher salt evenly over the surface.  Cover pan with heavy duty aluminum foil and place in preheated oven. Bake for an hour.  Stir and serve.

Enjoy!


Print This Post

IMG_0043
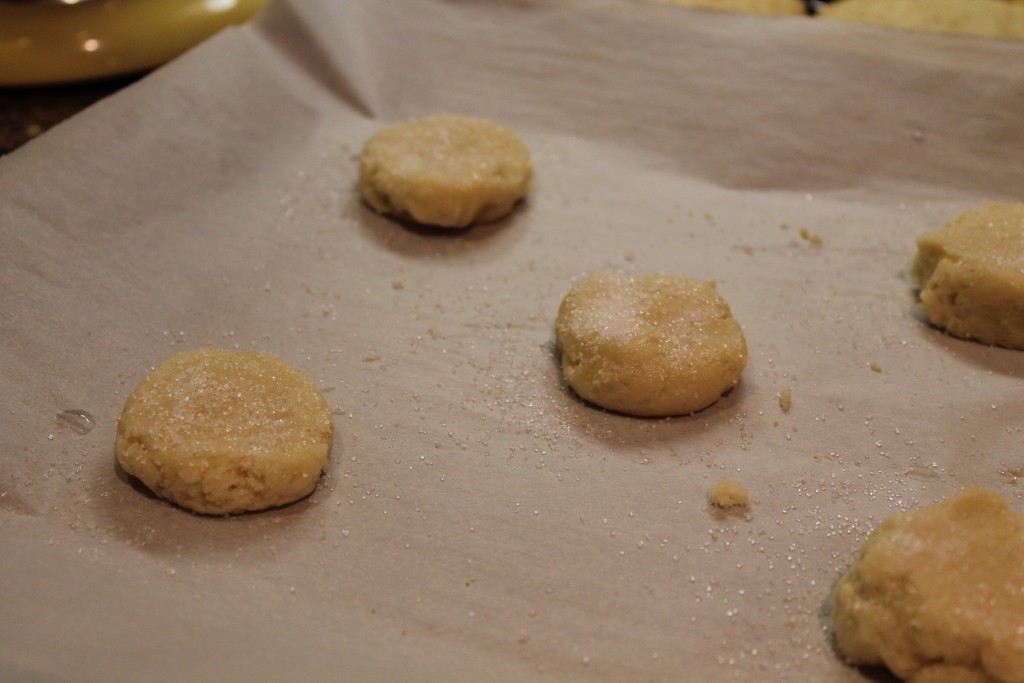
Who’s ready to watch some Cowboys action this weekend?  Sunday’s game may have inched my blood pressure a few more unfortunate steps up, but I’m delighted to have more football left to play in the season.  After being chronically disappointed by my Longhorns the last couple of years, I’m still a little in shock that we left the evening with a “W”.  Seriously, I’m contemplating burning all my orange in an actual fire, because I’m extremely superstitious and none of it brought the Longhorns a W when it counted.  Like a phoenix, the Longhorns must rise from the ashes.

I think the answer to Sunday’s shocking comeback win lies in this Caramelized Onion Dip.  It has long been my most requested appetizer and when paired with my Homemade Oven Chips – a game changer is born.  I think the Cowboys lived to see another day solely so we could enjoy this dip once again.  You may have heard that unscrupulous refereeing was the tipping point. But I know the truth, caramelized onion dip and homemade potato chips ensured the real win.  The Ice Bowl starts at noon, Sunday, and I expect you to be ready. In light of this, since Soup Swap starts at 6pm, you better prepare your soup on Saturday.  If you don’t have time to make your own onion dip, let me know.  I’ll make it for you.  In the words of young Hiatt, “Giddy up, Cowboys!”

Caramelized Onion Dip Recipe

(adapted from adashofsass.com)

makes about 2.5 cups, serves 6ish – feel free to double, I almost always do

2 large yellow onions (note **** not sweet onions, maui or 1015, just regular yellow)

2 large shallots

2 tbsp butter

2 tbsp olive oil

1/4 tsp cayenne

1 tsp kosher salt

16 turns fresh ground pepper

6 oz cream cheese, room temperature

2/3 c. sour cream

2/3 c. mayonnaise

Slice and peel onions, slice rings into 4 quarters.  Slice and peel shallots, slice rings in half.  Heat a saute pan over medium heat until hot, then add butter and olive oil.  Stir to melt butter, then add onions and shallots.  Season with cayenne, salt, and pepper.  Stir to combine, then cook over the medium heat about 10 minutes.  IMG_0013

Reduce heat to 25% above your lowest setting.  Stir and cook until soft and browned.  This takes forever.  Onions are easy to burn and that is not the flavor you want, so don’t be tempted to put your heat on high to shave off time.  Sometimes I cook them for an entire hour!  Low and slow, or be prepared to watch like a hawk to prevent over browning.  You want the end result to look like this. Remove from heat and set aside to cool.  IMG_0023

In a stand mixer with your paddle attachment, mix cream cheese, sour cream, and mayonnaise.  Mix until combined and smooth.  If your cream cheese is still cold, it will look lumpy for awhile.  Walk away and let it continue mixing, eventually it will become smooth as silk.  When it looks like silk, add in your onion mixture and stir, just to combine. Dip a chip and season to taste, if required.  Get ready to sit back and bask in the glory, because everybody loves this dip.


Print This Post

Baby Bok Choy Recipe

IMG_1560 (2)
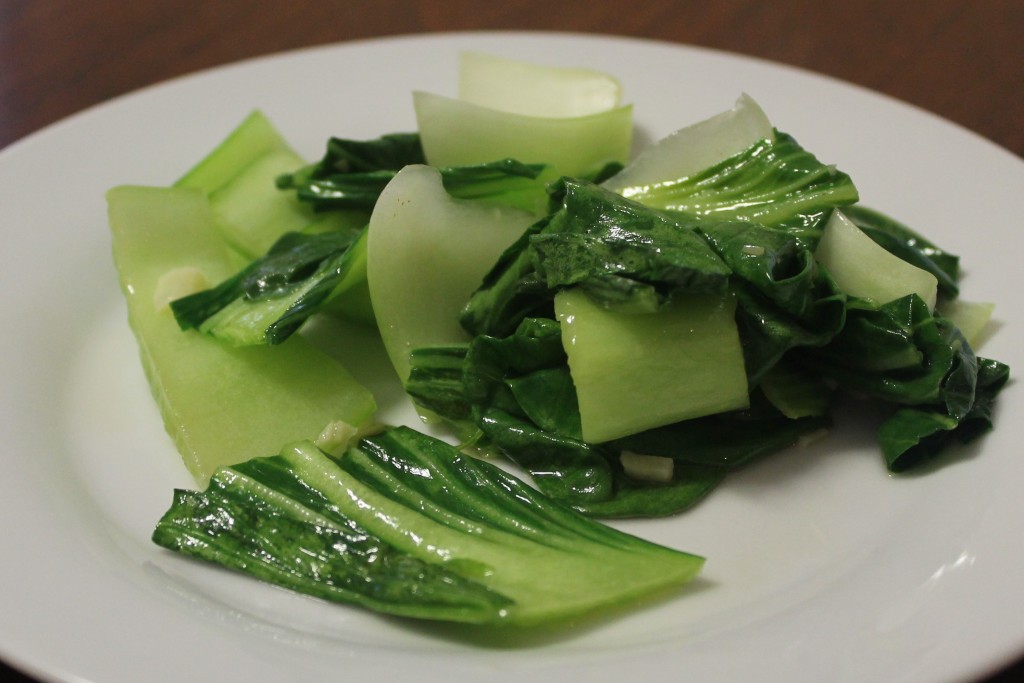
Baby Bok Choy is my favorite new vegetable.  They are so adorably cute, delicious, fast, and easy!  I think the flavor is a little like softened celery – very, very mild.  Baby Bok Choy is very low calorie, and packed in Vitamins A, C, and K.  Nutrient dense and prepared completely in 10 minutes.

Baby Bok Choy Recipe

serves 4

2 baby bok choy

1 tbsp olive oil

3 cloves garlic, minced

1/4 c. chicken broth

Trim the base off of the baby bok choy and separate the leaves.  Wash thoroughly, then chop into 1 inch segments. Separate into three groups of base segments, middle pieces, and green leaves.

Heat a wok over medium high heat.  Add olive oil , heat until fragrant and hot.  Add garlic and saute for 1 minute. Add thicker base segments first, saute for 1 minute, then add middle pieces.  Stir and saute 1 more minute, then add the green leaves.  Stir with a wooden spatula, then add chicken broth. Cover and steam for 1 minute, then serve.

Enjoy!


Print This Post

Fresh Basil Pesto Recipe

IMG_1550
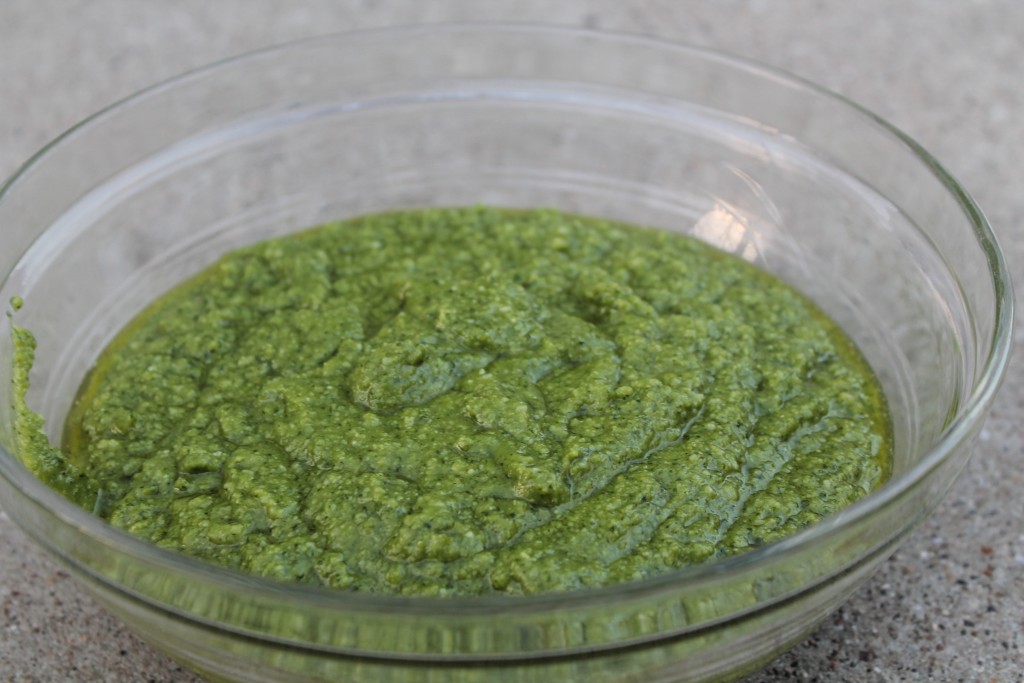
You simply can’t beat freshly made basil pesto.  Store bought doesn’t hold a candle.  The key to this recipe, in my opinion, is that the Fresh Basil comes directly from a living plant – and a pretty living plant.  Look for one with no dark spots on the leaves.  In Dallas, I find live basil in most stores, but Trader Joe’s has the best – both price and longevity.

These basil plants can be found at Tom Thumb and often at Central Market.  They are still in soil, but kind of floating in water in that plastic bag, so only will live about a day.  The plants from Trader Joe’s are larger and in a full pot so could last quite awhile as long as you water them!

IMG_1534 (2)

Fresh Pesto is great for lots of recipes!  You can use it as a vegetable dip, top sauteed Portabellas, make paninis, make chicken pesto pasta, or top crostini.  Fresh Basil Pesto can stay in your fridge for 1 week.  After that there is a botulism risk from the garlic and oil.  You could freeze some by adding a little oil to the coat the surface, but I’d suggest just finding more ways to enjoy your basil that first week.  : )

Fresh Basil Pesto Recipe

makes 1 cup of pesto 

2 c. firmly packed Fresh Basil Leaves, torn from a live plant (3 of these or 2 of the larger plants from Trader Joe’s)

1/4 c. pine nuts

3 cloves garlic, sliced

1/2 c. firmly packed and freshly grated Parmesan Cheese

1 tsp Murray River salt

16 turns fresh ground pepper

1/2 c. olive oil

Place all ingredients except olive oil in food processor.  Pulse several times, then turn to on setting.  Drizzle the olive oil in slowly from the top while food processor is spinning.

Enjoy!

Print This Post

Older Posts »